 |
| On my nails- Wet n' Wild in Shield & NYC Empire State Blue. |
Thursday, June 30, 2011
NOTD
Here's a nails of the day! However, this is from earlier today and the Wet n' Wild polish is terrible and chipped all over. Boo... I might just have a new notd tomorrow. The blue polish, which was also cheap as it is an NYC color is still hanging on strong, though. I put on Essie No Chips Ahead top coat, which I love, but apparently can do nothing to salvage the Wet n' Wild nail polish.
Wednesday, June 29, 2011
It's Wednesday!
That means it's beauty inspiration follow-up day! Wednesdays are all about getting even closer to our beauty inspirations. It can be by recreating a look, getting a couple questions answered... anything! This week's follow up is a Taylor Swift inspired look. Read on!
 |
| I used my Conair Infiniti Curling Wand, I'm sure everyone knows what this is by now! |
 |
| I curled half inch to one inch sections of hair to get this look. |
 |
| The makeup I used for this Taylor Swift inspired look: ELF 100 color eye palette Body Shop face primer ELF tinted moisturizer Benefit erase paste Maybeline Dream Matte powder LUSH lip scrub Nivea chap stick ELF Natural Nymph lipstick ELF Luscious Liquid Lipstick in Baby Lips Benefit Stay Don't Stray NYC liquid liner Revlon creme quad in Black Magic Tarte eyelash curler ELF eye widener (white eyeliner) Rimmel black eyeliner Three mascaras: Too Faced Lashlight, Rimmel Lash Accelerator, and Bare Minerals Buxom Lash Too Faced eyeshadow palette Sonia Kashuk Highlight brush, ELF Studio Powder brush, ELF blending brush, ELF studio concealer brush, and ELF studio eyeshadow C brush. Okay, that was quite a mouthful. You may use whatever products you like to recreate the look, that's the fun part! Here's a rundown on how I achieved my Taylor Swift look. -Prime your face with your favorite primer. -Slap on a tinted moisturizer. I like this better than liquid foundation because it keeps everything a little lighter and more natural, just like Taylor's skin. -Use a concealer to cover any blemishes and under eye circles you may have. -Set your makeup with a powder, this will help keep you shine free! -Prime your eyelids. -Use a black base (I used my Revlon quad for this, but a NYX jumbo pencil or a black pencil eyeliner will work... anything along these lines) and fill in the outer two thirds of your eyelid up to your crease. Create a soft swoop along the outside to get a subtle cat eye. Be sure not to get any black on the inner corners. Use a blending brush to smooth and soften this. -Now take a black eyeshadow and use the same blending brush and swirl this onto the lid, directly where you placed the black base. -Using an eye shadow brush, use a shimmery flesh toned color in your inner third. Use the same color to highlight your brow bone. -Use the blending brush to blend everything together, as well as any harsh lines. -Use liquid or gel liner to make a really thin thin along the entire lash line. -Line your inner corner and your cheek one with a white eyeliner for a highlight. -Use a black pencil liner to line your water line and tight line all the way around. -Curl your lashes and apply a thick coat of one or more mascaras. If you have false lashes, this is a good time to use them! -Apply a light flush of color to your cheeks. I used a soft peachy pink color from Too Faced, but you can use whatever compliments your skin tone best. -Prepare your lips however you like, I used a scrub and a chap stick. -Use a light pink to nude color lipstick, then apply a pinky nude gloss. This will pull the look together as well as tone down the eyes. When you're done with hair and makeup, you should get something like this!    This is the Too Faced palette I used for blush and my inner corner and highlight color. It's a customized one I received as a gift so I'm not sure of the colors. Hope you enjoyed! |
Tuesday, June 28, 2011
Beauty Inspiration of the Week
On this blog, every Tuesday is Beauty Inspiration day. BOTB chooses one beautiful and inspirational girl to feature. Girls of any age, shape, and size are eligible! Any girl is eligible, famous or not.
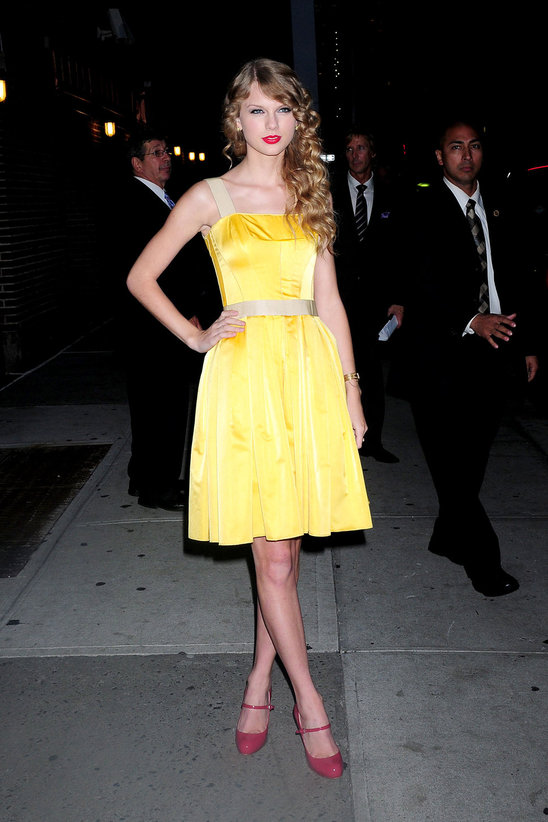
Our inaugural beauty inspiration is the one and only Taylor Swift.
What makes her beautiful?
Taylor Swift is a name everyone knows. Her songs have touched and helped millions of people across the globe. She is a simple beauty, but with a twist. Taylor has a different type of look than most girls. Her style is unique and inspiring, and, no pun intended- fearless.
Taylor told People magazine, "I love makeup. When I go on stage, I get to play with my look and try on all kinds of different colors--try red lips tonight, purple eyeshadowtomorrow. You get to play around with all these different characters, and I think that's one of my favorite things about makeup--you can put on a new character." Taylor's love for makeup, and of course her fame, landed her a spot as the face of Covergirl Cosmetics.
Taylor Swift is known for quite a few signature looks, which are her cat eye, her curly blonde locks, and, of course, her bold red lips. However, Taylor is more than the looks. What really makes her beautiful is the way she expresses herself, which is her music. Her true emotions shine through in her songs. She admits to her flaws and pours her heart and soul out for the world to see, or should I say, hear.
Look out for a Taylor Swift inspired look, coming soon!
DIY Sea Salt Spray
Follow these steps for an effortless, beachy look that's perfect for summer!
What you'll need:
A spray bottle
-one that holds a decent amount of water, a cup or more is good.
A measuring cup
Sea Salt
Measuring spoon (tsp or tablespoon)
Some type of conditioner or serum
Gel or Hairspray (optional)
-So, to start off, you'll want to take your measuring cup and fill it up with a cup of warm water.
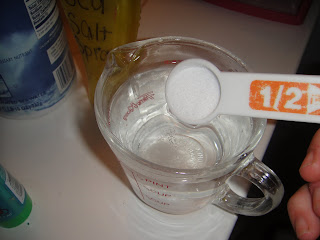
-Next, fill your measuring spoon with sea salt. You can use anywhere from one teaspoon to one tablespoon of sea salt per cup of water. I find that using 1/2 a tablespoon works best for my hair, but you may need to experiment a bit depending on your hair type.
-Pour the sea salt into the measuring cup and stir.
-After this, i like to pour my mixture into the bottle.
-Next, take your conditioner. This step is crucial because sea salt is very drying to hair. You can use any conditioner or serum you like. It can be cream or liquid. Just squirt or spray a little into your spray bottle. Just eyeball this step, you don't need too much.
-If you'd like, you can also add a little bit of gel or hairspray into your mixture if you'd want a little extra hold.
-Now just screw on your cap, shape the bottle, and you're all set!
Using your sea salt spray
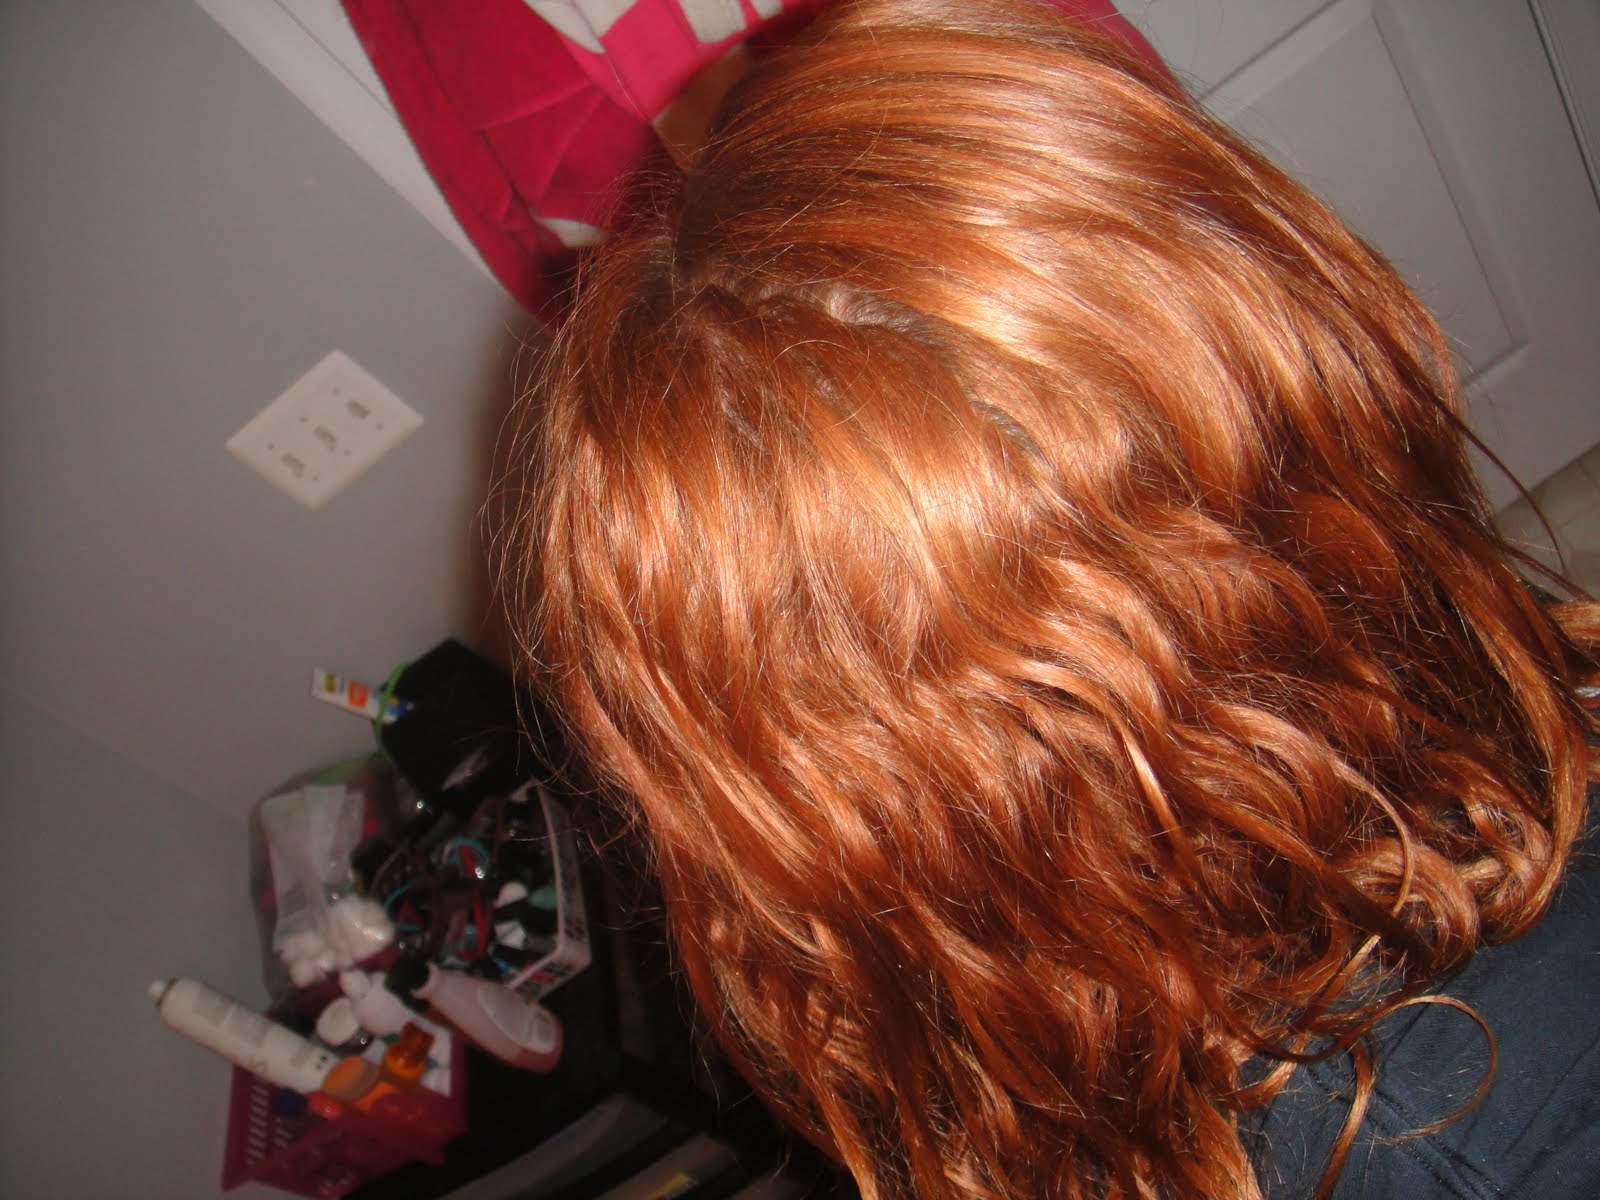
I find that sea salt spray works best when your hair is damp or dry. It won't do much in soaking wet hair. Simply spray a good amount into your hair, root to tip and scrunch. Then, style as desired!
All of the products you need/ might use.

Here are the steps in pictures:
 Don't forget something to add moisture!
 You may use one or more type of product to get the moisture. Here, I show Aussie Hair Insurance leave in conditioner, Frizz Ease serum, and Garnier Fructis leave in creme conditioner.


 And some gel for hold (optional).

Here are two pictures of what my final product looks like- yours may vary!


What you'll need:
A spray bottle
-one that holds a decent amount of water, a cup or more is good.
A measuring cup
Sea Salt
Measuring spoon (tsp or tablespoon)
Some type of conditioner or serum
Gel or Hairspray (optional)
-So, to start off, you'll want to take your measuring cup and fill it up with a cup of warm water.
-Next, fill your measuring spoon with sea salt. You can use anywhere from one teaspoon to one tablespoon of sea salt per cup of water. I find that using 1/2 a tablespoon works best for my hair, but you may need to experiment a bit depending on your hair type.
-Pour the sea salt into the measuring cup and stir.
-After this, i like to pour my mixture into the bottle.
-Next, take your conditioner. This step is crucial because sea salt is very drying to hair. You can use any conditioner or serum you like. It can be cream or liquid. Just squirt or spray a little into your spray bottle. Just eyeball this step, you don't need too much.
-If you'd like, you can also add a little bit of gel or hairspray into your mixture if you'd want a little extra hold.
-Now just screw on your cap, shape the bottle, and you're all set!
Using your sea salt spray
I find that sea salt spray works best when your hair is damp or dry. It won't do much in soaking wet hair. Simply spray a good amount into your hair, root to tip and scrunch. Then, style as desired!
All of the products you need/ might use.

Here are the steps in pictures:


Here are two pictures of what my final product looks like- yours may vary!

Subscribe to:
Posts (Atom)